1. Log in to ASAv
See Logging in to an ASAv for more information.
2. Generate Self-Signed Certificate
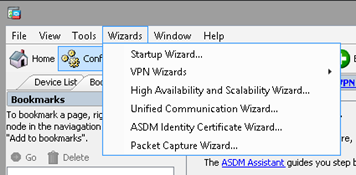
Launch Identity Certificate Wizard
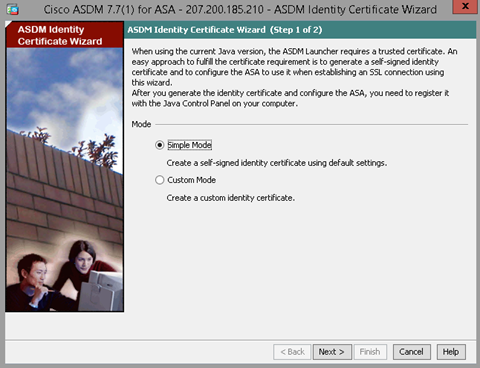
Run the Identity Certificate Wizard in Simple Mode. Download the certificate to import later.
Export & Register Certificate in Java
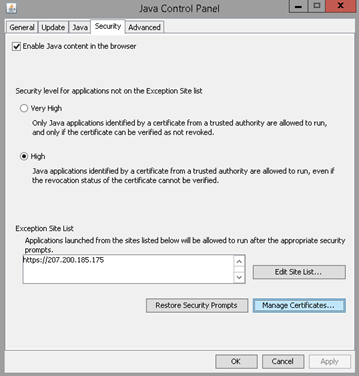
Right-click on the local instance of Java on whichever machine is running ASDM, and select Properties.
Navigate to the Security tab and select Manage Certificates.
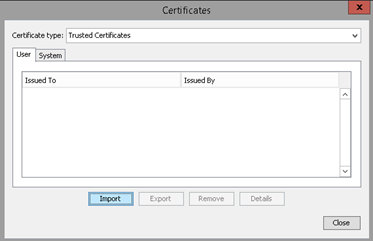
Select Import, navigate to the certificate created by ASDM, and import that certificate. Apply all settings.
3. Run AnyConnect Wizard
Once the certificate has been imported, return to ASDM. Go to Wizards at the top, then run the AnyConnect VPN Wizard as shown below.
Create Profile
Name the profile appropriately. Select the OUTSIDE interface.
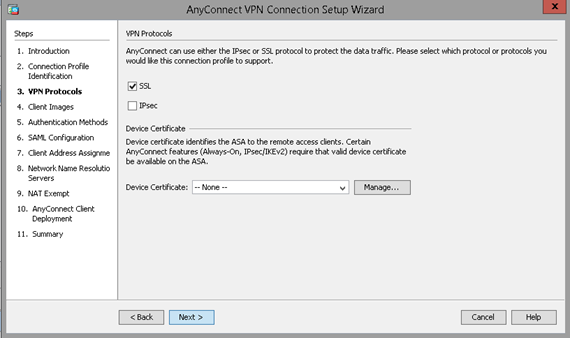
Select SSL Protocol
Select the Device Certificate generated earlier from the dropdown menu.
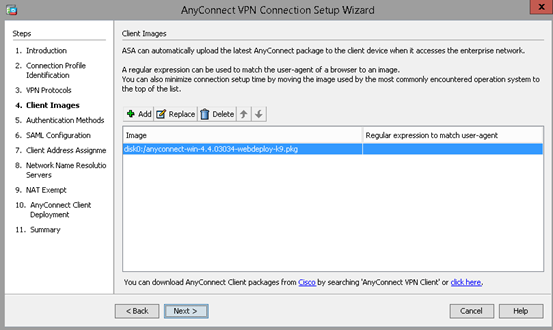
Select AnyConnect Image
AnyConnect Images can be obtained by contacting GreenCloud Support.
Configure Authentication
Authentication can be performed against a local username/password list, which is directly configurable from the “Authentication Methods” screen. Enter each username/password pair into the Local User Database to configure.
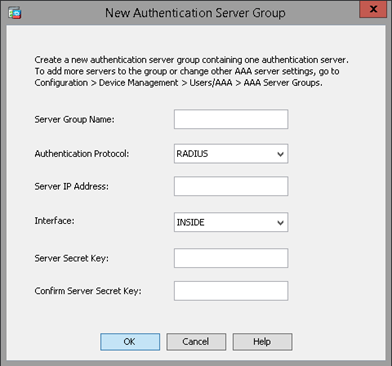
Alternately, RADIUS authentication can be set up by selecting “New…” next to the “AAA Server Group” dropdown.
Configure the Domain Controller’s internal IP and authentication group, and add the Secret Server Key, then select OK. This will authenticate VPN users against the Domain Controller’s user database.
Create IP Pool
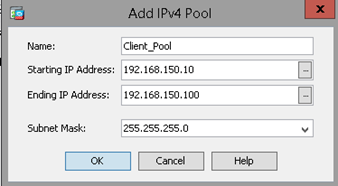
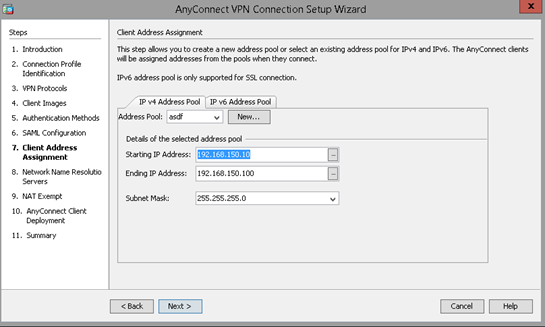
Select “New” from the “Client Address Assignment” page. Specify a separate IP pool from all other subnets available on the customer’s networks.
The address pool created in this step should be auto-selected in the Client Address Assignment page.
Configure DNS
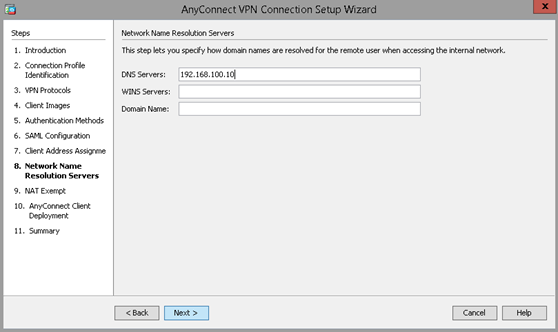
Input the internal address of the customer’s DNS server. Enter the Domain Name if appropriate.
NAT Exempt
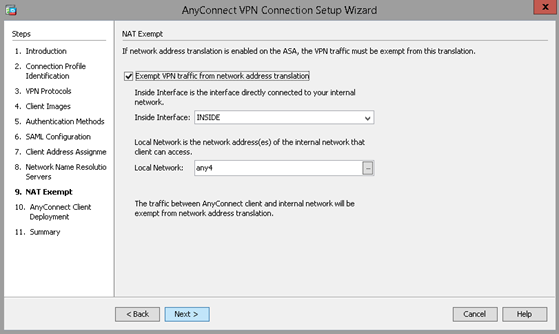
Select the “Exempt VPN Traffic…” checkbox in order to make the VPN NAT exempt.
4. Save Configuration
Select “Finish” after verifying the VPN configuration. Send the commands to the ASAv in the CLI commands window.
5. Add Split Tunnel Configuration
A Split Tunnel configuration allows the VPN to route traffic across both the external and internal interfaces. This allows outward-facing traffic to behave normally while internal traffic is routed through the VPN.
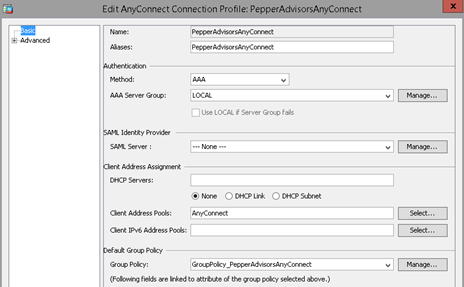
Under “Configuration”, select “Remote Access VPN” in the lower left, and expand “Network (Client) Access”. Then select AnyConnect Connection Profiles. Find the VPN that was just set up under Connection Profiles, select it, and click “Edit”. This will display the connection profile editing window as shown below.
Select “Manage” next to the Group Policy dropdown as shown above.
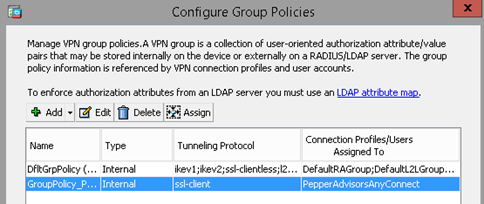
Find the group policy for the selected VPN (not the default one), select it and click “Edit” above.
Uncheck “Inherit” next to Policy, and select from the dropdown menu “Tunnel Network List Below”. Then uncheck “Inherit” next to Network List, and select “Manage”.
Under the Standard ACL tab, select “Add”, then select “New ACL”. Name the new ACL, then select “Add” then “New ACE”. Leave the Action radial button on Permit, and select the internal subnet (usually INSIDE-network/24) for the address. Add a description, and select “OK” on every nested menu before this one.
6. Download AnyConnect Client
Navigate to the external IP of the ASAv in a web browser. The AnyConnect Download page will be displayed. Download the client and run the installer. If the AnyConnect Client hosted on the ASAv is old or out of date, please open a ticket with Green Cloud Support to upload the most recent AnyConnect Client image.
7. Connect VPN
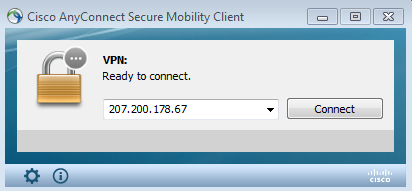
Once AnyConnect is installed, run the application and enter the external IP of the ASAv.
Enter the credentials as specified in the previous steps, and verify that the target network can be reached.

